[개발] 리액트로 Compound Component(합성 컴포넌트) 적용해보기
👏들어가기 전에...
이번 포스팅의 주제는 합성 컴포넌트로, children에 대해서 잘 모르겠다면 이 전 포스팅을 보고 오는 것을 추천한다.
[React] children 알아보기 (tistory.com)
[React] children 알아보기
최근 가장 관심있게 공부하고 적용하려고 노력하는 것이 있다. 그것은 바로! 리액트 디자인 패턴 중 하나인 합성컴포넌트이다. 내가 처음 React를 배울 때는 디자인 패턴을 고려하지 않고 개발을
humor12.tistory.com
사이드프로젝트를 통해 많은 코드를 작성하면서 느끼는 것은 바로 프론트엔드가 다뤄야 할 관심사가 너무나도 많다는 것이다. UI로직, 서버 로직, 유저 인증인가 로직...이러한 관심사를 잘 분리하지 않는다면 스파게티 코드가 될 수 있다는 것을 체감하였다.
그렇다면 어떻게 해야지 컴포넌트를 잘 분리하면서도 유지보수가 잘 되는 코드를 작성할 수 있을까?
그 해답은 바로 '합성 컴포넌트'이다! 한 번 실제로 합성컴포넌트를 적용해 보면서 자세히 알아보도록 하자.
✨ 1. 컴포넌트 구현해보기!
컴포넌트를 만드는데 필요한 코드는 다음과 같다! (실제 코드는 아니니 유의 할 것)
interface Props{
    id: string;
    info: string;
}

function Card({ id, info }: Props){
	return	(
            <div>
                <Profile/>
                <div>
                    <span>{id}</span>
                    <span>{info}</span>
                </div>
            <div>
 	);
}
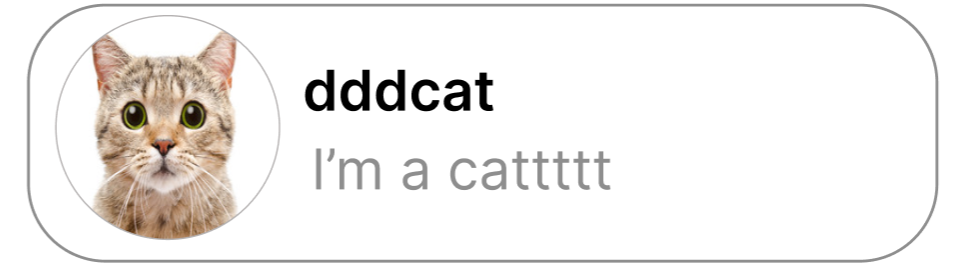
처음 만들어야 하는 컴포넌트는 매우 간단하였다. 단순히 유저 프로필이 들어가 있고, 유저의 id, 그리고 유저가 설정해놓은 자기소개 문구만을 보여주면 되었다.
🤕 2. 추가 요구사항
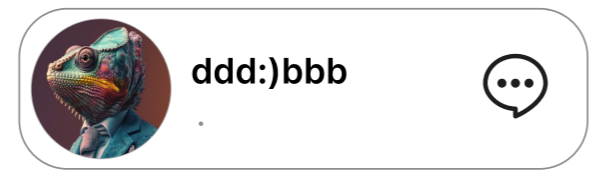
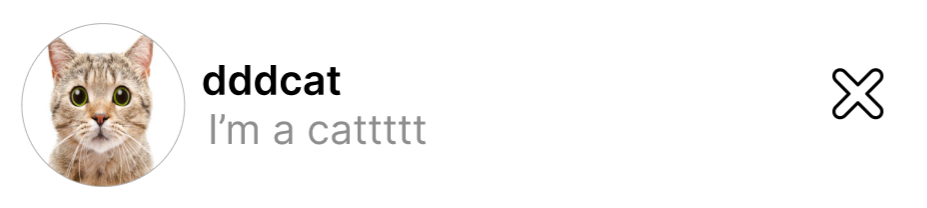

어? 그런데 개발을 진행하면서 위와 같이 계속 더 다양한 Card가 요구로 되기 시작했다! 버튼들이 다양해지기도 하고,
추가적인 정보가 들어가야하는 요소들이 생기기 시작했다. 처음 만들었던 컴포넌트에 props들을 늘리는 방향으로 코드를 짠다면 코드가 조금은 복잡해지겠지만 재사용성을 유지 할 수 있다.
interface Props{
    id: string;
    info: string;
    commentTime: string;
    onClickButton: (e: MouseEvent) => void;
    buttonName: string;
    messageButton: boolean;
    cancleButton: boolean;
}

function Card({ id, info, commentTime, onClickButton, buttonName, messageButton, cancleButton }: Props){
	return	(
        <div>
            <Profile/>
            <div>
                <div>
                	<span>{id}</span>
                    {buttoName && <button onClick={onClickButton}>{buttonName}</button>}
                </div>
                <span>{info}</span>
                {commentTime && <span>commentTime</span>}
                {messageButton && <img src='...' alt='대체'/>}
                {cancleButton && <img src='...' alt='대체'/>}
            </div>
        </div>
 	);
}
하지만 여전히 불안한 마음이 마음 한 편에 자리 잡고 있다. 만약에 요구사항이 더 많아진다면? 그 때마다 props는 늘어나게 되고 코드 또한 점점 스파게티 코드가 되어 갈 것이 불 보듯 뻔하다. 또한 단순히 props가 많아지는 것 뿐만 아니라 props를 받아 처리하는 컴포넌트의 특성상 각 컴포넌트의 위치는 구현 시점에 이미 결정이 된다. 만약 commentTime이 info 보다 위로 올라와야 한다고 가정한다면 컴포넌트에 추가 처리를 할 필요가 생겨버리게 된다는 것이다. 이대로 컴포넌트를 방치해두기만 한다면 기존에 해당 컴포넌트를 사용하던 곳에서 사이드이펙트가 생길 수도 있게 되며 유지보수가 어려워 질 수 있다.
👍 3. 합성 컴포넌트를 써보자!
합성 컴포넌트란 하나의 컴포넌트를 여러가지의 집합체로 분리한 뒤에 각 컴포넌트들을 사용하는 쪽에서 조합하여 사용하는 컴포넌트 패턴중 하나이다.
우선 구현한 컴포넌트를 서브 컴포넌트로 분리를 해야하는데 대게 큰 의미를 갖지 못하는 요소들을 서브 컴포넌트로 정하게 된다! 나와 같은 경우에는 유저의 id를 나타낼 UserId, 댓글의 시간을 나타낼 CommentTime 등 Card의 구성요소가 될 수 있는 것을 서브 컴포넌트로 만들었다.
interface IUserCardProps{
    children?: ReactNode;
}

const UserId = ({children}: IUserCardProps) => {
    return(
        <div css={/*스타일*/}>
            {children}
        </div>
    )
};


const CreatedTime = ({children}: IUserCardProps) => {
    return(
        <div css={/*스타일*/}>
            {children}
        </div>
    )
};

// 기타 서브 컴포넌트
이제 서브 컴포넌트를 구현하였다면 메인컴포넌트를 만들 차례이다. 서브 컴포넌트들을 묶어서 화면에 보이게 하는 Wrapper 성격의 컴포넌트이다.
interface CardMainProps {
    children?: ReactNode;
    isOpen: boolean;
}

function CardMain({children}: CardMainProps){
	return(
            <div>
                {children}
            </div>
    	);
}
위처럼 작성하면 children으로 들어오는 서브 컴포넌트들은 순서에 따라 위에서 아래로 배치되게 된다.
하지만 Card의 서브 컴포넌트들은 단순히 위에서 아래로 흐르지 않고 특정한 곳에 있어야한다. 예를 들면 MessageButton과 CancleButton은 오른쪽에 붙어 있어야 한다. 그렇다면 컴포넌트의 위치를 잡아 줄 방법은 없을까?
다음은 일부를 추출한 코드이다!
const UserIdTypes = (<UserId/>).type;
const CreatedTimeTypes = (<CreatedTime/>).type;
const MessageImgTypes = (<MessageImg/>).type;

const getUserId = (children: ReactNode) => {
    const childrenArray = Children.toArray(children);
    return childrenArray
    .filter(
        child => isValidElement(child) && child.type === UserIdTypes,
    ).slice(0);
};


const getCreatedTime = (children: ReactNode) => {
    const childrenArray = Children.toArray(children);
    return childrenArray
    .filter(
        child => isValidElement(child) && child.type === CreatedTimeTypes,
    ).slice(0,1);
};

const getMessageImg = (children: ReactNode) => {
    const childrenArray = Children.toArray(children);
    return childrenArray
    .filter(
        child => isValidElement(child) && child.type === MessageImgTypes,
    ).slice(0,1);
};


function CardMain({children, onClick}: IMainProps){
    const userIdContents = getUserId(children);
    const createdTime = getCreatedTime(children);
    const messageContents = getMessageImg(children);

    return (
        <S.CardContainer onClick={onClick}>
            {profileContents}
            <S.UserInfo>
                <S.UserId>
                    {userIdContents}
                    {buttonContents && (
                        <div>
                            {buttonContents}
                        </div>
                    )}
                </S.UserId>
                {userDescribeContents && (
                    userDescribeContents
                )}
                {userComments && (
                    userComments
                )}
                {createdTime && (
                    createdTime
                )}
            </S.UserInfo>

            {messageContents && (
                messageContents
            )}
        </S.CardContainer>
    )
}
위 코드에서 필자가 왜 앞부분에서 children에 대해 보고 오라고 했는지 알 것이다. Children.toArray() 와 filter 메서드를 이용하여 마치 어항(children) 속에서 왔다갔다 하고 있는 물고기들(sub components)을 뜰채로 건져올리는 느낌으로 원하는 물고기(sub component)를 가져온다. 가져온 후에는 지정된 진열장(return문) 안에다가 배치해준다.
Main, Sub components를 묶어서 export 해주기
그 후에는 컴포넌트들을 export를 해준다. 이렇게 하는 이유는 각각의 컴포넌트가 Card 컴포넌트임을 확실히 알 수 있게 함이다!
export const Card = Object.assign(CardMain, {
    UserProfile,
    UserId,
    UserDescribe,
    UserComment,
    CreatedTime,
    MessageImg
})
컴포넌트를 사용해보기!
<Card>
  <Card.UserProfile src={null}/>
  <Card.UserId>{comment.user_id}</Card.UserId>
  <Button name='reply'
  onClick={() => onReplyClick(comment.user_id, comment.id)}/>
  <Button name='mention'
  onClick={() => onMentionClick(comment.user_id, comment.id)}/>
  <Card.UserComment>
    {comment.comment}
  </Card.UserComment>
  <Card.CreatedTime>
      {comment.created_at}
  </Card.CreatedTime>
</Card>
훨씬 직관적이고 어떻게 생겼을지도 예측하기가 쉽다. 또한 만약에 추가로 요구사항이 생겼을 경우, 중간에 서브 컴포넌트만 끼워넣으면 되니 매우 간편하다.
📕 참조
합성 컴포넌트로 재사용성 극대화하기 | 카카오엔터테인먼트 FE 기술블로그 (kakaoent.com)
합성 컴포넌트로 재사용성 극대화하기 | 카카오엔터테인먼트 FE 기술블로그
방경민(Kai) 사용자들에게 보이는 부분을 개발한다는 데서 프론트엔드 개발자의 매력을 듬뿍 느끼고 있습니다.
fe-developers.kakaoent.com